Replacing Shift Knob

RNajarian

200 MPH
Speed Member
Messages
238
Reaction score
0
Points
0
Hi Gang. I picked up a Very clean shift knob and boot for my 2000 Boxster. I have a couple of questions I know this forum has the answers to.

One What Do I need to know and do to change the shift knob?

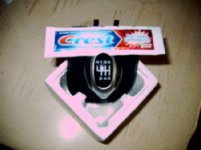
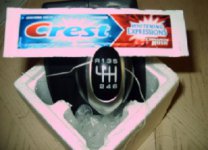
Two My car is a five speed and the new knob I picked up is a six speed. Can the two shift patterns be switched on the knobs. (The black shift pattern imbedded on the top of the knob, see Attached photo.)

Thanks
 

Attachments

  • ba_1.jpg
    ba_1.jpg
    8 KB · Views: 62
Changing the knob is easy. It's either held on with a set screw/bolt or not. To check, pry up the shift boot and then lift it up so you can check if there's a screw in use and if there is loosen it. Next, straddle the shifter (top down preferably) and pull. If it won't come off, pull harder.

The shift pattern isn't a separate part which means you can't go buy a replacement, so be careful here. The patterns are held on with an adhesive (double-stick tape?) and may be removed if done carefully. Use a thin, flexible tool to slip under an edge and slowly work it to release the pattern. The trick is to not damage the pattern as you can't get a replacement so I'd suggest removing it from the newly acquired knob as practice as that pattern is potential trash. Then do the same with the original pattern. Once they're both removed you just need to attach the right pattern to the right knob :).
 
Foolproof Way to Replace Shift Pattern Inlay

Over the Years I have scratched many a shift knob while trying to replace the shift pattern inlay. With Tom's inspiration I may have come up with a foolproof way to replace the shift pattern inlay with NO SCRATCHING or DESTRUCTION of the inlay.

FIRST I got a sturdy thin flexible soft material to wedge under the inlay. My Tool? A package of sample toothpaste. NOT a tube of toothpaste but the small samples dentists give out. The sample toothpaste is packaged in a metal foil material which is coated with a plastic/rubbery material. So when wedged under the inlay it does not scratch the inlay or the shift knob. I worked it gently under the inlay until it slighty separated.

SECOND Get some waxed floss. (Yes, if you are wondering I am a dentist) Slip it between the shift knob and the inlay and gently work it down the inlay pattern. The inlay is glued to the shift knob, no clips like in other knobs. And that is it! No Scratches.

I apologize for the poor photographs but I think they are clear enough to see my removal procedure. I hope this helps someone.
 

Attachments

  • shift knob inlay 01.jpg
    shift knob inlay 01.jpg
    18.8 KB · Views: 56
  • shift knob inlay 02.jpg
    shift knob inlay 02.jpg
    19.3 KB · Views: 49
  • shift knob inlay 03.jpg
    shift knob inlay 03.jpg
    17.7 KB · Views: 58
Glad you got it sorted out. I was thinking of a thin feeler gauge or something similar. Sounds like some heavy duty aluminum foil would probably work as well. I guess to be safe one could always tape off the parts that might get scratched but it's probably not necessary.

Is there enough adhesive to just put it on the other knob or is it necessary to glue it down using super glue?
 
There was enough sticky from the new boot to allow the old inlay pattern to stay in place. If glue were needed I would use the least amount possible, just "tack" it in place.

I didn't realize how beat up the old shifter was until I compared it side by side to the new one. Now the problem is "what project for my car should I take on next . . . "
 
Back
Top